Bill Gibson | Kennel Master Gamekeeper Kennels
Wounding game is an inevitability that every bird hunter encounters. Many times we wound a bird and it sails down but is still very much alive. We immediately cast our dog to increase the chances of successfully retrieving the bird. Stunned by the dog’s abilities, we watch as he picks up the bird and returns to us. Just before we are able to grab the bird, still alive, our dog drops it and it jolts away. The bird then flies away or disappears into heavy cover never to be seen again.
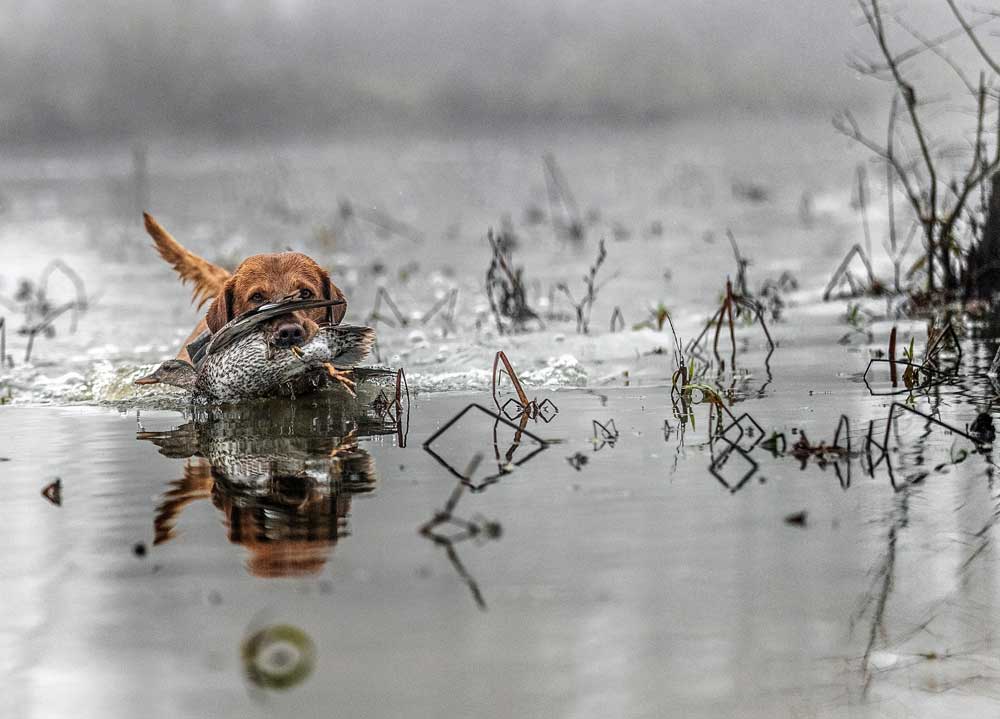
From a conservation standpoint, this is the last thing we want. The wounded bird is likely to die slowly from its wounds, and we must take another bird to reach our bag limit; thereby, negatively impacting the numbers of our valuable wildlife resources. This example shows why it is very important that our retrievers are trained to properly hold a bird without dropping, crushing, or chewing on it. We should train our pup to return and deliver the bird to hand by tilting its head up and releasing the bird on command.
Cause of the Issue
In a previous article, we presented means and methods to correct “minor hold issues.” In this article, we present steps to correct major hold problems. On occasion, we take in pups for training and are immediately presented with a major “hold” problem. A major hold problem is one where the dog makes the retrieve, but every time they return, they drop the dummy at our feet. They should instead hold, present and deliver the dummy/bird to our hand.
So, what is the root cause of this behavior? Sometimes, it can be attributed to genetics. For example, a pup could have a very “soft mouth” – the dog uses a very soft grip when retrieving. However, the most likely cause is that it is the result of using poor training techniques during the early training stages (7 weeks to 6 months of age).
While there are many causes of dropping, one of the most prevalent is incessantly throwing marks and using bad techniques that instill bad habits in the young pup. The most common mistake is on the return after the pup retrieves the dummy - the trainer snatches the dummy from the dog’s mouth as it runs by or as soon as it returns. Then, they immediately throw another mark.
For example, some time ago, I observed and listened as a trainer attempted to justify his training technique by verbalizing that he was building the dogs “prey drive” by having the pup retrieve, retrieve, retrieve, retrieve. He claimed that these multiple retrieves are the name of the game and a necessary building block in the dog’s development. The trainer completely ignored the fact that the pup was being taught to break on every retrieve and on return, taught to drop the dummy at his feet or a few feet in front of him in lieu of delivering to hand.
My take on the trainer’s technique was that he advocated, at an early age, that the pup did not need to learn steadiness or any type of patience. Instead, the pup should be allowed to break, go out as fast as he could, come back as fast as he could, and return the dummy as fast as he could. Make no mistake, his techniques were successful in building the pup’s prey drive, but at what cost? In the dog’s mind, the quicker he can return the dummy, the faster he will get another retrieve (his reward).
This can create a list of bad habits, but for the purposes of this article, we will focus on the “hold” issues. We view this as an excessive and unwise retrieving drill. This form of training is nonessential for dogs that are bred to love retrieving – it is in their DNA.
Why You Should Wait Until Summer to Train Your Hunting Dog
Prevent the Issue
Instead, it is wise to begin training your pup at a young age that it is important to obey if he wants to retrieve. No, we do not want to put a slip lead on him at 7 weeks old and make him sit completely steady until we cast him. However, it is wise to offer at least a little restraint to begin instilling obedience and steadiness. Most importantly, for the purposes of this article, you should begin to allow your pup to carry the dummy for extended periods of time. Begin walking around the yard after they have retrieved the dummy and encourage him to follow you while holding the dummy. This is just one example of the ways you can attempt to avoid any future hold issues all together.
“Breaking” is the pup running right after the retrieve as soon as it leaves your hand; this is an issue that is relatively easy to correct. It may take a little time to completely suppress a breaking habit but the steps to do so are relatively simple.
On the other hand, a hold issue…not so much. Dropping becomes a firmly established habit. Fortunately, even a major issue of dropping and not delivering to hand can be corrected, but it is difficult, requires increased effort and an extended amount of time.
Condition Hold – Correcting the Issue
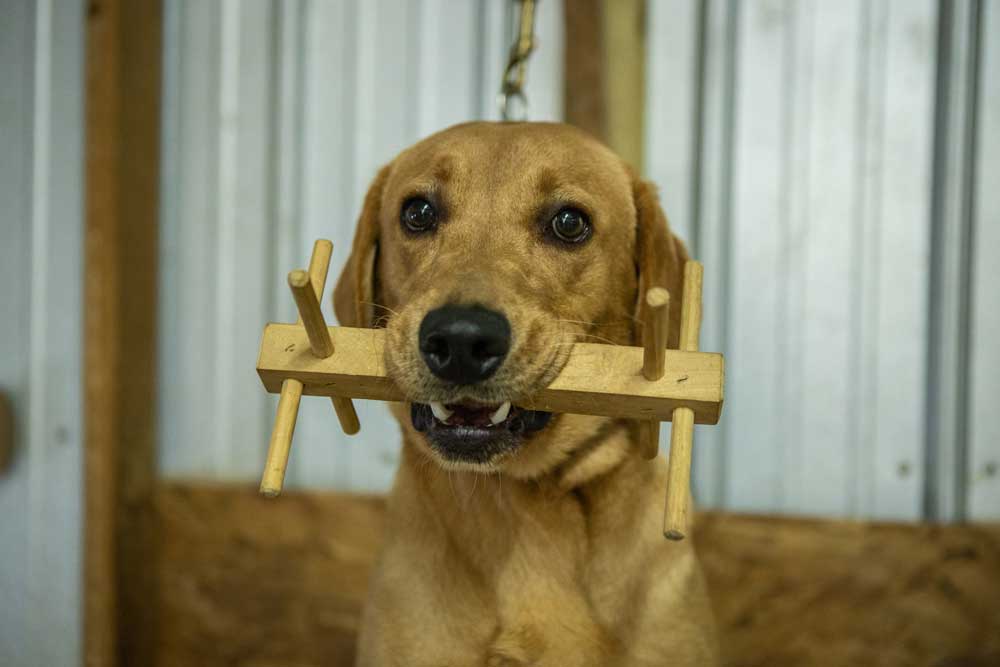
It goes without saying, that we prefer to train a dog with a natural hold, but this is not always possible. To address and correct this issue, we use a three-step training technique referred to as “conditioned hold.” To be clear, this is not the same as “force fetching” a dog. The concepts are the same, but conditioned hold is a low-force alternative that has proven to be just as successful. There is no ear pinching, or electric collars involved. Equipment needed to address a major hold problem consists of a training table, a check cord attached to a slip lead, a “training buck” and a training dummy.
Best Way to Eliminate Dog Odors
Phase 1
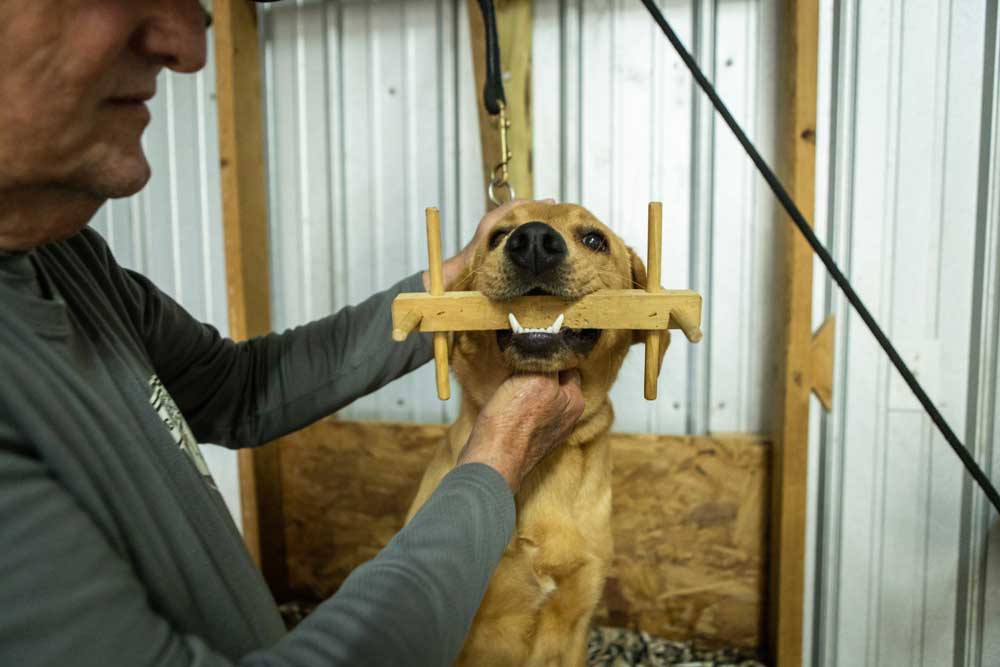
In this phase of conditioned hold training, we put the dog on an elevated table so that they are sitting level with our waist and their head is close to shoulder height. We then put a check cord attached to a slip on them and tie it off so that it holds his head steady and prevents body movement. We use a slip knot to secure the lead so if the pup bolts, we can immediately release the lead without risking injury to the dog.
Next, we command “hold” and place a training buck (hereafter referred to as a “buck”) in the dog’s mouth. We place it just behind the canine teeth, while being careful to insure that pup’s upper and lower lips are not between the buck and his teeth. This can cause discomfort or pain and actively work against what you are attempting to instill. With our left hand behind the dog’s head holding the cord, and our right hand under the dog’s chin, we use our right thumb to apply upward pressure to the “V” in his chin and command “hold.”
At first, the dog will resist holding the buck. He may begin to resist even opening his mouth. In this case, it is wise to have a person help you perform this drill. Have the other person put pressure on the slip lead while you attempt to place the buck in dog’s mouth. There should be pressure applied while the dog is resisting and as soon as the buck is firmly in the dog’s mouth, release the pressure. As the dog begins to comply, we stroke his/her head or back and repeat “good” over and over again. After a short period, we command “give,” release the pressure exerted by our thumb and take the buck out of the pup’s mouth. We then reward them with more praise. If the pup drops the dummy before the “give” command, apply pressure by pulling the cord upwards and tightening the lead around their neck until you are able to replace the buck in the pup’s mouth. The time interval between placing the buck and releasing the buck is incrementally increased until the pup holds the buck for an extended period.
We repeat this sequence five times and then quit for the day. For five consecutive days we repeat the sequence until the dog holds the buck in his mouth for extended periods of time. When we are completely satisfied with their performance, it is time to move to phase 2.
Phase 2
This phase is merely an extension of the foundation laid in “phase 1” and uses the same basic procedure(s). The primary difference being we begin to back away from the dog and expect the dog to hold the “buck” until we move back in, touch the buck, and command “give.” Start at a distance of a foot or so away and continually increase the distance in between you and the dog. If the dog drops the buck, we immediately retreat to the dog, apply pressure with the cord until we can reinsert the buck in the dog’s mouth and then walk away.
Again, for five consecutive days we repeat this sequence five times each day with the dog holding the training buck in the mouth for extended periods of time. When we are completely satisfied with their performance, we move to phase 3.
Phase 3
In this phase, we move the dog to the ground and gradually change from using the buck to a dummy. Once the dog is sitting and has the dummy in his mouth, we walk away and expect pup to hold the dummy until we return and command the pup to release. We gradually increase both the time and the distance until we are satisfied that the dog is complying with the “hold” command.
Again, for five consecutive days we repeat this sequence five times each day with the dog is holding the training dummy in their mouth for extended periods of time. Upon successful completion of the third phase, the dog should be ready to resume retriever training and should hold the dummy until told to release.
At the successful completion of each sequence with the pup, we reward verbally and physically by firmly rubbing him down the back and spine with our hand. The benefits derived from the firm rubbing actions are twofold. Firstly, the stimulation feels good to the pup and thus rewards them for a task well done. Secondly, it also teaches the dog to remain steady by keeping him from moving about on the table and on the ground. It will take many repeat sessions to complete the three phases, but by the end, the dog should firmly hold the dummy, tilt his head up to present the dummy, and release the dummy on command.
Correcting Unwanted Movement During Casting Drills
Dropping on Water Retrieves
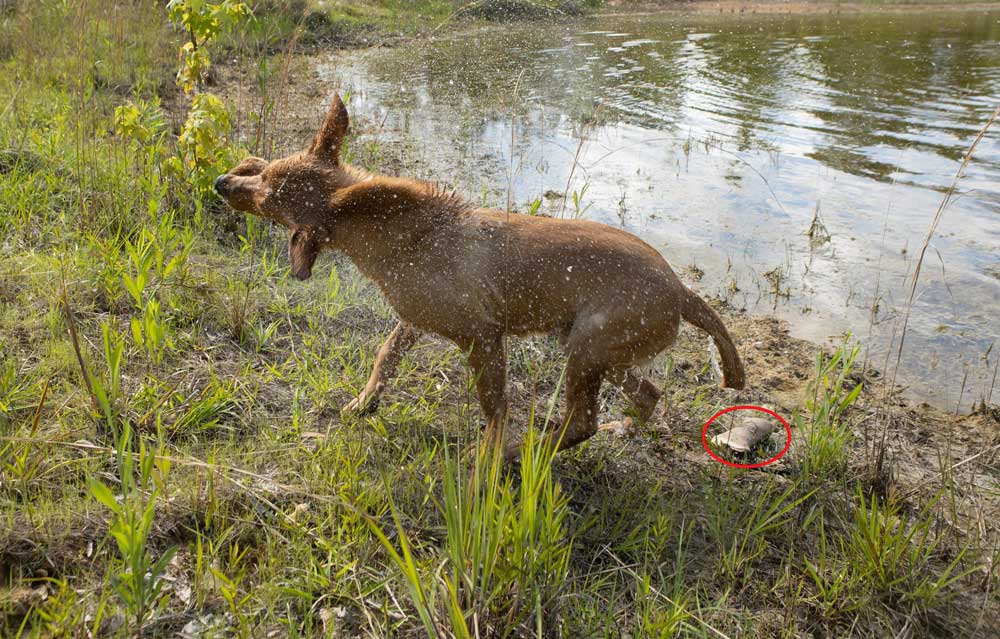
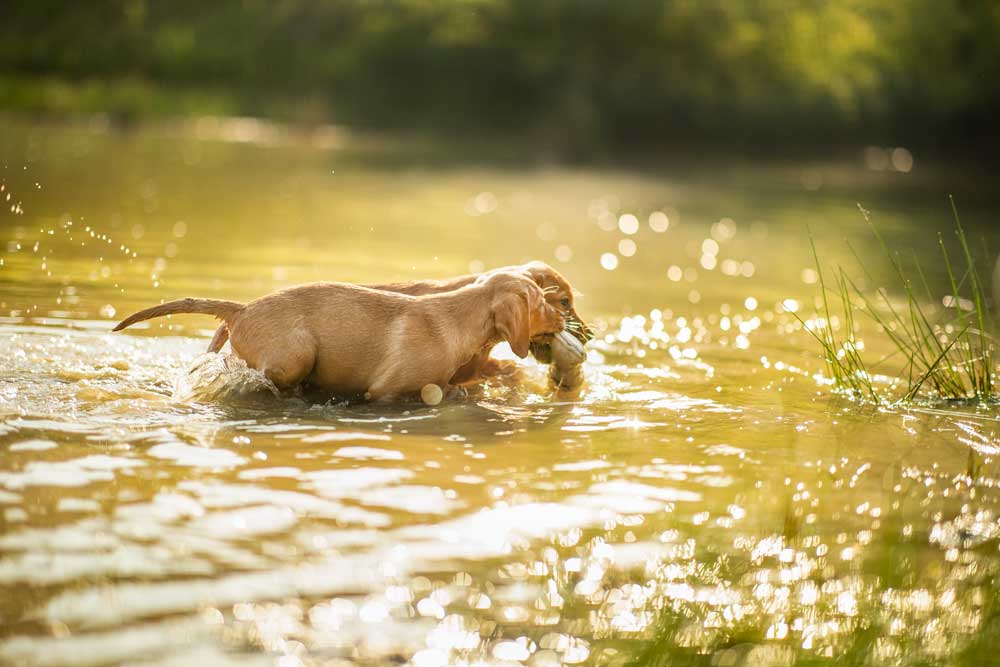
Another hold issue that is quite common is dropping the dummy on a water retrieve. The dummy is thrown, the dog swims out and retrieves the dummy and begins returning with the dummy. However, upon reaching the bank, they immediately shake and drop the dummy. After shaking the pup returns to the handler either with or without the dummy – it makes no difference; the same issue is at play.
By allowing this unwanted behavior of dropping the dummy and shaking, the dog will likely revert to dropping the dummy on a land retrieve. Our way of correcting this behavior, before it gets out of hand, is to step out into the water and take the dummy before the dog reaches the edge of the pond. It is funny, but it seems that a dog’s mind is programmed to shake as soon as they reach dry ground. Rarely will a dog shake while standing in the water. Once the dummy is in hand, we step out of the water and then use the word “shake” to teach the pup to shake on command. In short order the pup should be exiting the water while holding the dummy, delivering the dummy to hand, and shaking on command.
Additional Reminders
One thing to remember while attempting to correct a major hold issue using the conditioned hold technique; this drill is in no way enjoyable to your 4-legged friend. Approaching these sessions in the wrong way could be detrimental to you relationship with your dog. It can cause your pup to have trust issues, and in some cases, it can cause them to lose interest in retrieving.
For these reasons, it is important to:
- Stop 100% of retrieving until completion of all 3 phases.
- Begin by using something other than a dummy. We don’t want the pup to associate conditioned hold with retrieving dummies in the first or second phase of this drill. A training buck is recommended.
- Take your time and never push them too quickly. They say Rome wasn’t built in a day and neither is a good hunting dog. If your pup shows signs of spooking, back off. Start again tomorrow.
- Refrain from being too rough or over applying pressure. The trainer’s job is not to terrify their dog into submission, it is to enforce the rules.
- After each session, spend time being affectionate with your dog. Remind them that they are your best bud.
- Lastly, do not hesitate to back up to the previous step if they don’t perform to standard. All three phases are essential and need to be perfected.


