Landowners use tractors to facilitate property improvement and maintenance. Implements allow a tractor or ATV to complete numerous tasks for a landowner. This could beg the question, “what came first, the tractor or the implement?” The following is a look at popular implements, the function and scope of each and an average price range. For reference, we will consider those implements commonly associated with tractors in the 30 to 60 horsepower (HP) class. Most tractors these days operate with an industry standard “Category 1 three-point hitch” (3PH), so alternate hitch methods will not be reviewed.
Tractor Rotary Cutters
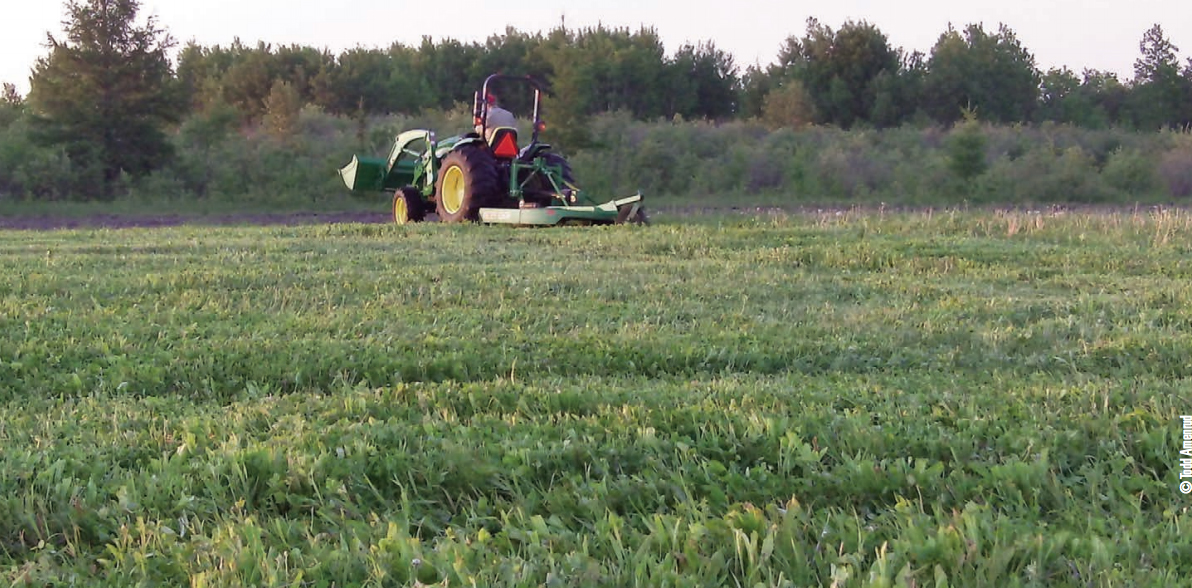
Just as Xerox became a common name for every copier and Kleenex for nose tissue, “bushhog” has become a name synonymous with rotary cutters. As far as this writer is concerned, if I was allowed just one implement, it would be the rotary cutter. It can clear ATV trails, remove rough brush and grass and open the way for no-till enhancement of wildlife habitat. I hope it never comes to only having one implement.
Cutters start in the 4-foot variety, indicating the width of the cut, they increase in even increments up to the type that the highway department uses on road right-of-ways. A five or six foot is most common, not exceeding the outside width of the back tractor tires. Easily lifted by the 3PH these smaller units are perfect for work in timber stands and food plots. Select a rotary cutter based on the PTO horse power of the tractor. A legitimate implement dealer can recommend the perfect fit to your tractor.
Following are a few talking points to consider when purchasing a new cutter. If ever there was a case for overkill, the rotary cutter is it. While you may never need to cut something bigger than planned, be prepared to do it. If you think you’ll never need to cut anything bigger than 1 /12 inches, buy a cutter rated at 2 inches. Don’t skimp, you will regret it if you do.
Slip-Clutch VS Shear Pin: There are good arguments for both varieties. Designed to save the gearbox, the slip-clutch models are for heavy to very heavy duty models, such as those utility companies use to cut right-of-ways. If a stump, rock or other object is struck by the blade the clutch will slip. When a slip-clutch wears out, it will be more costly to replace than the cheaper shear pins. The pins are inexpensive, but in rough cover will shear more often. Keep a few spares in the tool box just in case. My old King Kutter uses shear pins and I’m good with that. I’ve put the cutter through heck and a half and had to change fewer than half-dozen pins in 20-plus years. Maybe I’ve finally removed all the stumps in my plots.
Horsepower ratings on rotary cutters are matched to the PTO horsepower ratings of the tractor. My tractor, a New Holland Workmaster 45, is rated at 39 PTO horsepower. Typically the PTO is rated about 5 HP lower than the engine. A Land Pride cutter I’ve been eyeballing is rated at 20-65 HP has a 2-inch cutting capacity. The deck is 10- gauge sheet metal with 1-inch thick blades mounted on a 10-gauge dishpan (a.k.a. stump jumper).
Servicing a rotary cutter is pretty simple – follow the manufacturer's guidelines for lubrication and adjustments. Periodically check the nuts and bolts to insure they are tight. With the unit disconnected from the tractor, sharpen the blades with an angle grinder or have them sharpened at the implement dealer. Scrape collected plant/grass residue off of the inside of the deck periodically to keep the mower in balance and the blades rotating properly.
Tractor Disk and your Food Plot
The industry uses both disc and disk, for instance Kubota uses disc, but John Deere uses disk. Gamekeepers most often uses disk, so go with the flow. A disk has two purposes: breaking up the soil prior to planting, and killing snakes unlucky enough to be in the plot when the disk passes over. They perform equally well at both tasks.
Simply defined, a disk is a set of round cutting blades called gangs, mounted in offset fashion as to use the weight of the implement to disturb the earth. Disks are typically two or four gang. The number of blades on each gang may vary from three to eight blades. Chances are if you are reading this you already own a tractor and a disk.
Most common are the four-gang models. The front two sets cut into the ground at a preset angle throwing the soil in an outward direction. The back gangs are reversed, throwing the soil in the opposite direction. When a plot is cut to the hubs, the disk has done all it will do; the hub being the axle that holds the gang of blades together.
Disk Harrows are a bit more complex and far more functional. These units have adjustments on the offsetting gangs that pulverize the soil and create a finer seedbed. Most have angles of zero, 7, 14 and 21 degrees. Using the harrow at 0- degrees following the sowing of seed will give the plot the appearance of being planted with a drill. A few features found in better disk harrows include square tubing that will allow a single operator to change the angle of the blades with a single handle. An adjustable toplink will allow the operator to adjust the disk to the height of the tractor. The disk needs to be parallel to the ground to operate properly.
Disk blade scrapers are well worth the money as an option, but they add to the weight and increase the HP required to properly lift and operate it. Care should be taken to avoid stumps and rocks when disking as striking one of these could lead to a cracked or broken blade. Never ever stand on a disk as a slip could allow a leg to fall into the gang resulting in a very nasty cut, even when the tractor is not operating.
Maintaining a disk is pretty straight forward; keep the bolts tight, the blades checked for breaks and cracks and bearings greased or replaced if they wear out. Use a pressure washer to remove dirt and residue from the implement before storing. This will reduce the possibility of rust and lessen the relocation of weeds and grasses from one area to another by catching a ride on the implement.
Box Blade vs Adjustable Blade
Both types of blades will move dirt around, and both have features the other lacks. For that reason, these should both be in a gamekeeper’s barn. There will be plenty of opportunities to use both for specific purposes.
A box blade has a pair of fixed blades for pushing and pulling, and a number of shanks (4 to 8) for ripping and cutting roots, and such. A box blade is the best thing, short of a bulldozer, for creating or expanding a food plot in a wooded setting. The box blade should be no wider than the width of the tractor’s rear tires. The shanks can be raised and lowered as needed to achieve the task at hand. Once the shanks have dispatched the roots and woody material, they can be raised or removed to allow the box to push the trash.
An adjustable blade can be angled in any number of positions to allow the operator to create or clean out a ditch, or spread material, such as gravel along a road. For re-crowning a woods road no tool is better.
Spreaders for your Food Plot
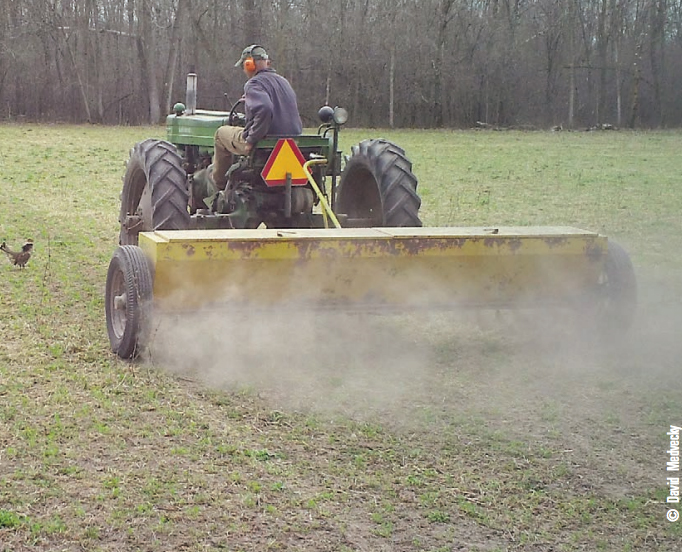
There are two ways to distribute fertilizer and seed on a food plot: By hand, with a five-gallon bucket tucked securely under one arm, or mechanically. The bucket has to be refilled regularly, and hand application leads to gaps. A mechanical application is faster, more uniform, and efficient.
Broadcast spreaders are rated by the capacity of the hopper. Most 3PH models start around 200 pounds and go up. A lot of “co-op” models, sold at farm and garden stores hold 300 on up to 500 pounds and work well. But they may lack some features that lead to long life and dependable service. Cheaper models have a metal hopper and stamped metal parts. If properly washed, dried, and lubricated after every use they will be good to go for years to come. If neglected, the rust and corrosion caused by today’s commercial fertilizers will render them useless in a few seasons. Land Pride offers a great model with a Polyurethane hopper and spinner plates, spinner vanes, hopper doors and hardware made of stainless steel. It’s still wise to wash and properly store the unit but these features will greatly add to the life of the unit. An internal agitator is also standard equipment.
A drop-spreader is another type some gamekeepers will be familiar with, especially if you have acidic soil and need to apply lime. Those who have tried to apply powdered ag lime with a broadcast spreader know what I’m talking about – a white cloud and regret, wishing you would have known. A drop-spreader is just that; you fill the hoppers and the material slowly drops. This implement is used to apply fine or light material like ash, lime and some native warm season grass seeds. Adjustments on the hopper doors and agitators inside the hoppers regulate how much material is applied.
Multi-purpose Tractor Implements
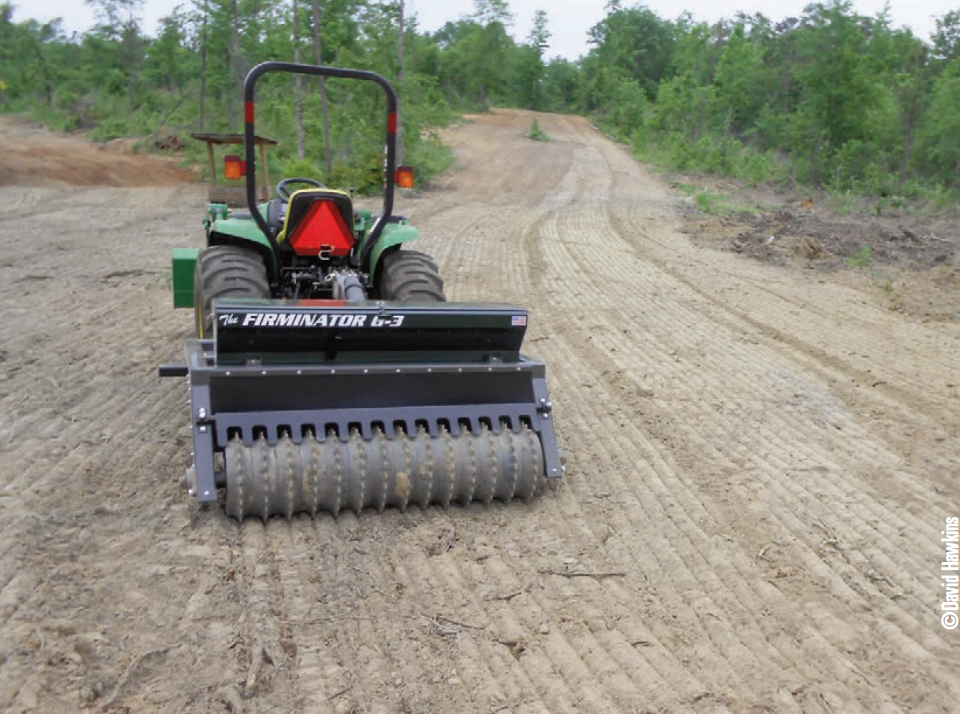
The Firminator is quickly becoming one of the legends in food-plot management. Manufactured in Georgia and sold directly from the factory to the end user, the multi-tasking machine can plant a wide variety of seed with simple operator adjustments. Coming in with a starting price of $5,000, the unit is a disk, planter, harrow and culti-packer all in one, making it a cost-effective investment. In close to nine years and hundreds of units shipped, there has never been a return. That is a testament to the quality of the American made product. “The disk blades are adjustable from a straight, minimum cut to a 45-degree maximum cut. The planter plates can be adjusted to drop the smallest clover or kale seed or set to handle a combo crop such as Lablab, or forage soybeans and corn. Land Pride also offers a combo planter in a variety of sizes - also made in America. These combination planters are ideal for lowtill or no till planting, but also work well to create a finished firm seed bed needing nothing more than a good shower to get it started.
Spray Rigs for Herbicides and Fertilizers
Spray rigs come in handy for a gamekeeper. From the smallest, that can be carried by hand, to the trailered version, weighing thousands of pounds; a spray rig can deliver herbicide and fertilizer exactly where it’s needed. Needless to say we can throw out the extremes on both ends and remain focused on those that will fit our focus group of tractors.
A 55-gallon tank on a TPH with a boom applicator is very close to the perfect unit for the average food plot/farm land manager. Filled with water and ready to roll the rig will tip the scales at just over 500 pounds. In all likelihood, it will never be filled to capacity. If you have a larger tractor, say, 60-plus HP, you might opt for the 110 gallon model. Both are run by a PTO powered pump, supplied with the sprayer. A few models will allow the operator to opt for a 12-volt pump. Either way, consult your equipment dealer for models and prices.
ATV pumps average a 15 to 25 gallon capacity and are most always electric. While ATV units are inexpensive and easy to use, the rate of application is determined by the speed of the vehicle. Over application can be an issue resulting in wasted money and time. ATV mounted sprayers typically come with a wand applicator, but short booms can be added, thus improving the application of the agent.
A wise practice for the first-time use of a tractor mounted or ATV sprayer is to determine the amount of chemical to cover a desired area. An acre is a good starting point. For the sake of simplicity let’s say 25 gallons is required to adequately cover an acre. Fill the tank with 25 gallons of plain, clean water, and determine the speed at which the tractor or ATV must travel to empty the spray tank on the acre-sized plot. Since tractors have varying transmissions and ranges, finding the “sweet spot” could take a few tries.
Make sure to wash out the sprayer tank in a safe place and run the pump long enough to flush hoses and nozzles. Switching from a chemical such as Arsenal to Weed Reaper or even to a water soluble fertilizer like MEEN green could prove dangerous to your clover plot should any Arsenal remain in the unit. A safe place might be a dirt road, a sand pit, or an airstrip. Read and follow disposal instructions in the chemical’s instruction booklet.
In a pinch, a spray rig filled with water is a good counter-balance for a front-end loader on a compact tractor. Especially a two-wheel drive tractor which can lose rear wheel traction should the loader become too heavy.
Tillers and Limb Saws
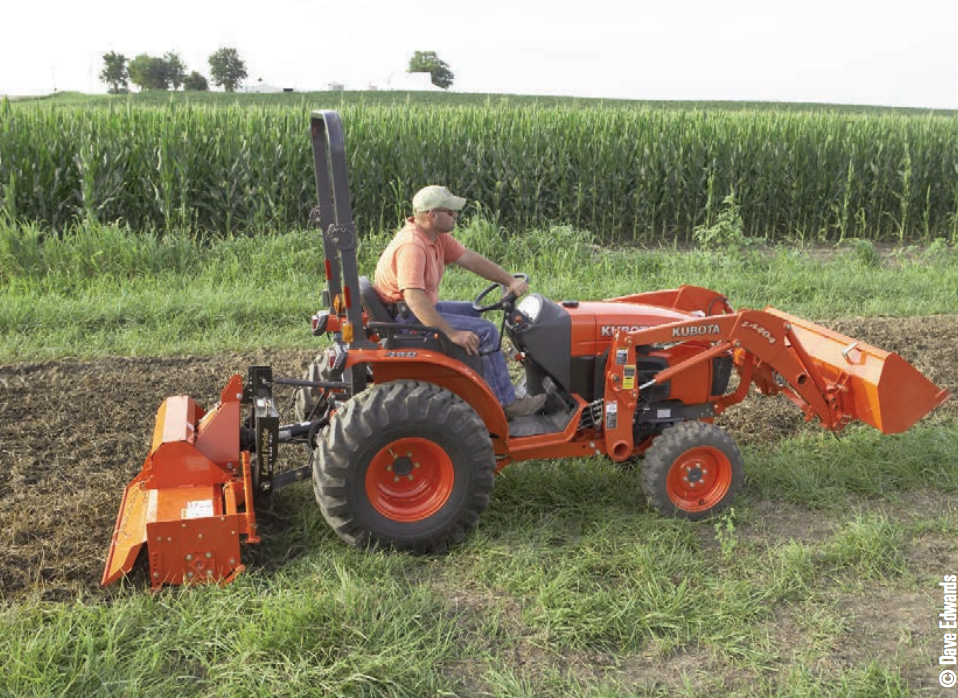
Tillers are super neat tools combined with a compact tractor. They will pulverize the seed bed, however, you may have some trouble if your plots contains rocks or stumps. A deer camp buddy has a Land Pride 74-inch RTR12 that is a machine to behold. His plots are clean and he tills under the weeds and grasses with no problems. The unit has a 50-HP gearbox and Category 2 slip clutch.
Limb saws are usually operated by a person standing on the ground; a task that can be tiring and in some cases dangerous. Falling limbs, sawdust and bark can cause discomfort to the operator and eye damage as well. Wendell McCracken, who holds patents of all sorts, owned and managed a 250-acre pecan orchard. When his eight children left home to find their own way in the world, Wendell invented a limb saw that fits on the bucket of a front-end loader. With a 20-inch bar the saw can cut limbs 8 feet higher than your bucket can reach. Powered by auxiliary hydraulics, there is no extra fuel to keep up with or having to demount the tractor to restart an engine. It is much the same as the saws utility companies use to clear limbs.
Tractor Harrow
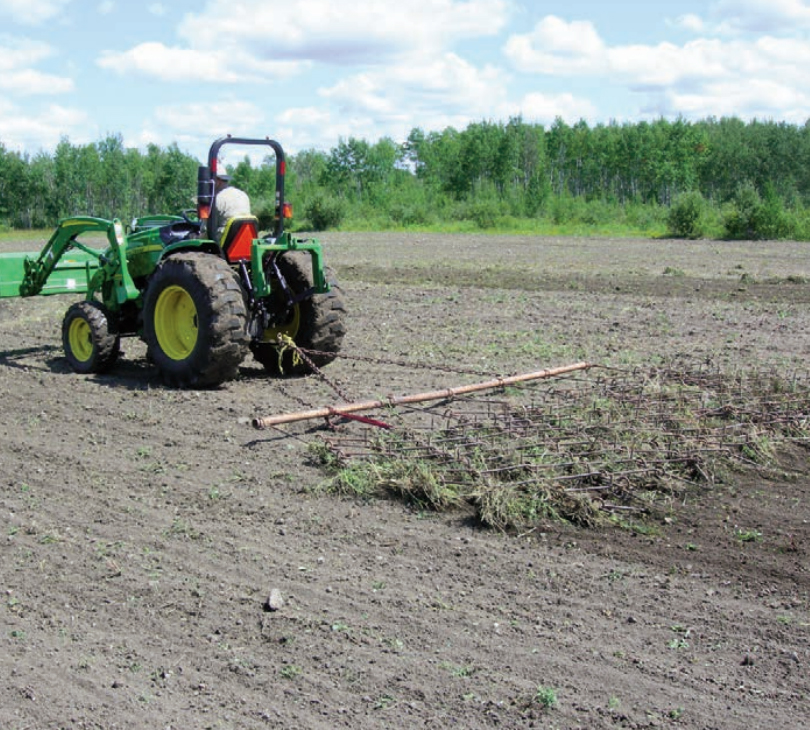
Last, but certainly not least is a simple harrow section. It's obviously not run off of the PTO, but it's such a versatile implement it deserves mention. With teeth that are approximately 8 inches long that can be used in three different ways – with the teeth up in the air, medium aggressive with the teeth down but facing backwards, and most aggressive with the teeth down and angled forward. These implements are very useful, inexpensive and versatile and can be used for everything from cleaning debris from a new plot to covering seeds of many sizes. It can even be used in place of a cultipacker with the teeth up when covering small seeds like clovers.
So there you have it – a short lesson on tractor implements and what to expect. Trust your local tractor and implement dealer to steer you in the right direction for the implements you need and the tractor you will be using to operate them.


