Bob Humphrey
Beginner bowhunters come from varying backgrounds. Some are veteran firearms hunters who long considered taking up the bow or are just looking for an opportunity to spend more days afield and put more venison in the freezer. Others are rank amateurs attracted by the allure. Whatever your case may be, there are a few things you’ll want to know before buying your first compound bow.
Aside from the obvious lack of gunpowder and noise, the fundamental difference between firearms and archery equipment is that the bowhunter is an integral part of the weapon. As a result, it’s critical that you be properly fitted to your bow. What follows are some guidelines to help you narrow down your search for the right bow.
The Eyes Have It
Your first step should be determining your dominant eye. It is possible to shoot wrong-handed - right handed if you’re left eye dominant, and vice versa - but in the long run you’ll save yourself a lot of frustration and will ultimately be a better, more accurate shooter if you go with your dominant eye, even if it’s not your dominant hand.
With both eyes open, extend your arm and point your index finger at an object roughly 10 feet away. Now close your left eye. If your finger is still pointing at the object, you’re right-eye dominant. Open both eyes; then close your right eye. Your finger should now be pointing to the right of the object. If the reverse is true, you’re left-eye dominant. Again, choose a bow that matches your dominant eye as that’s the one your brain automatically goes to for important information, like sighting on a target.
Draw Length
Next you need to determine your draw length, so you can ultimately match that to the proper draw-length bow. The easiest way is to draw a measuring bow at the local pro shop and have someone read the draw length directly from the graduated arrow. You can also measure your draw length at home with a tape measure and a helper.
Stand sideways at roughly arm’s length to a flat wall with your bow hand (left hand if you’re a right-handed shooter) facing that wall, in the same posture as if you were going to shoot toward the wall. Make a fist and extend your bow arm until the flat face of your knuckles is flush against the wall.
Adjust your distance to the wall until your arm is nearly, but not completely out straight. Don’t overextend your bow arm to the point where your elbow is locked. You’ll know if you’re overextending because the inside of your elbow joint will begin to jut outwards where, if you were actually shooting a bow, it might get slapped by the bowstring. Face the wall. Now simply have someone measure the distance between the wall and the right corner of your mouth to find your personal draw length.
Most bowhunters shoot with a release aid, which can add ½ to 1 inch to your draw length depending on your anchor point (more on that in a second). If so, you may ultimately want a bow with a draw length that is much shorter than your measured or actual draw length. If you shoot with a glove or tab, simply go with your exact draw length. Either way, you can fine tune this after you have found a comfortable anchor point.
Anchor Point
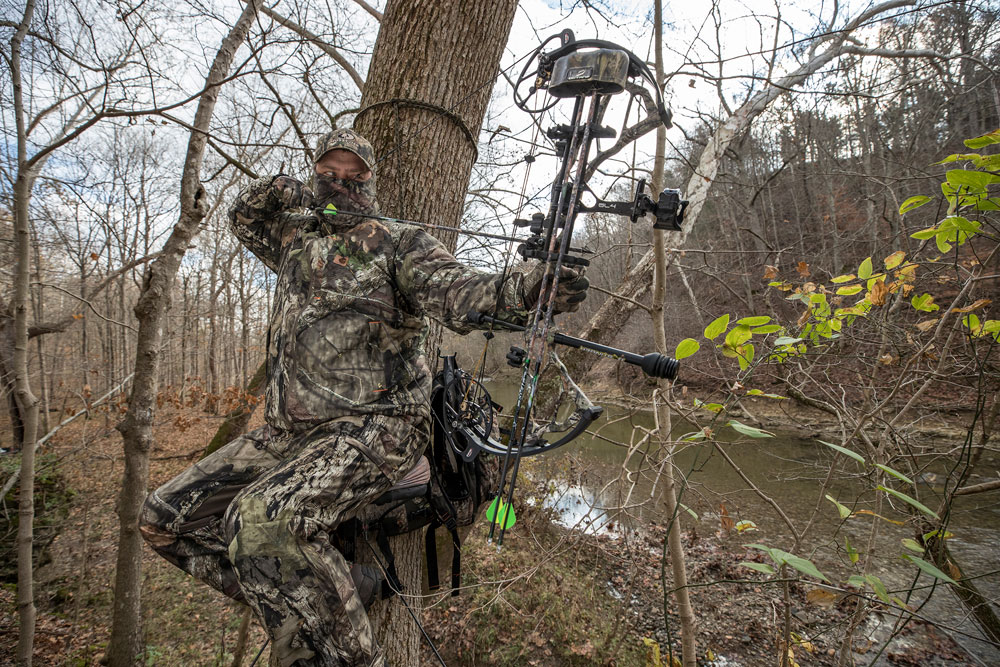
This is the point on your face where your draw hand comes to rest when at full draw. It is, to some extent a matter of personal preference and comfort but most shooters anchor the nock point close to the corner of their mouth. I use three anchor points. At full draw, the first knuckle of my thumb is tucked in the pocket at the base of my ear. The nock point, where my release aid is attached, just touches the corner of my mouth, and the bowstring touches the tip of my nose – three points. The important thing is consistency. Use the same anchor point(s) every time.
Draw Weight
Next, you need to decide on draw weight, a measure of the maximum number of pounds you must pull in order to bring the bow to full draw. Most modern compounds have let-offs between 65 and 80 percent so after the bow is fully drawn, you’ll only be holding 20 percent or so of its draw weight.
How many pounds you actually need is one of those highly debated issues. Many states have specific minimum weights for big game hunting - typically around 40 pounds. This is certainly enough to kill a deer, but you may want more weight for larger game like bear, moose and elk. More weight also means greater arrow speed, flatter trajectory, more kinetic energy and potentially greater penetration.
But there is a law of diminishing returns. Greater speed can reduce accuracy if your shooting form is not perfect, which is often the case for the hunter who may have to shoot from odd angles or positions. Furthermore, heavier weights are harder to draw. Shooting on the range in 65-degree temperature, you may be able to pull 75 pounds all day long. But sit in your tree stand for four or five hours when the mercury is hovering around the freezing mark and then try to draw it back, especially after your muscles are already twitching from that sudden surge of adrenaline when old Harvey Wallhanger suddenly steps into view.
Pick a weight you can draw comfortably under less than ideal conditions, bearing in mind that draw weight can be adjusted by tightening or loosening limb bolts. You can start low, maybe around 60 pounds, and crank up the poundage as you build up your shooting muscles. Also consider what you think your max weight will be as your bow will be more efficient if you’re shooting close to its maximum rating. For example, I shoot around 62-63 pounds so I use a 60-pound bow and crank it up rather than letting off on a 70-pound bow.
Let-Off
Let’s go back to let-off for a moment. Again, it’s the difference between the maximum weight required to pull the bow to full draw and how much weight you hold at full draw. Which you choose is, to a large extent, personal preference. The greater the let-off, the less weight you have to hold and the longer you can hold it. It used to be that high let-off bows were harder to pull but that’s not necessarily the case anymore. Also, the Pope & Young Club used to not accept entries shot with bows over 65 pounds, but now accept them up to 80.
Brace Height
Beyond the aforementioned there are numerous other options to consider, most of which boil down to shooter preference. However, there is one more worth mentioning among the basics. Brace height is the perpendicular distance between the bowstring and the grip of the riser handle when the bow is at rest. Longer brace heights tend to be more forgiving than shorter ones, while the latter can exaggerate minor breakdowns in shooting form, especially torque. On the other hand, faster bows typically have shorter brace heights. I prefer a longer brace height and would steer a beginner in that direction.
The above are basic guidelines to get you pointed in the right direction. After that, you’ll have to do your homework to decide on options like limbs, cams and accessories. But don’t fret about making the wrong choice. Once you get hooked on bowhunting, you’ll soon learn that upgrading is part of the fun.


