Greg Kazmierski
On a hunting property, the arrival of Spring brings along a season of anticipation and tradition. From the thrill of finding a nice set of shed antlers to uncovering morel mushrooms in your honey hole, there's an undeniable sense of excitement in the air. Along with these traditions lies the perfect time to return to the never-ending list of habitat improvements.
The types of habitat projects on your list can vary depending on the time you have available and your budget for the season. The good news is you can do a ton of habitat improvements with limited equipment on a smaller budget if you are willing to trade sweat equity.
Not only are the following habitat improvement projects cost-effective, but they work well when paired up with one another for better hunting. Now let's look at these projects, what you will need to complete them, and some tips and tricks to help you along the way. Once we understand the ins and outs, we can look at how you can pair these projects to help you stack your odds this hunting season.
Forest Stand Improvement
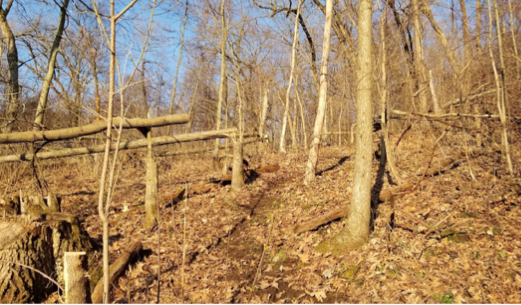
Forest stand improvement focuses on habitat improvement within wooded areas to better support the needs of the local deer herd. This is typically achieved by managing the forest to provide both suitable food sources and ground cover for deer.
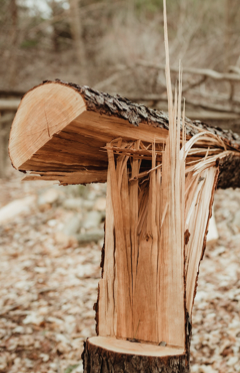
Common practices include selectively cutting trees to open up the canopy and promote new growth at the ground level, hinge cutting trees to secure newly opened areas, and creating an edge where two different types of habitat meet.
Forest Stand Improvement Materials and Tools
-
Chainsaw: The STIHL MS 170 is a great fit for most people. It is lightweight and has enough power to get you through a full day of cutting.
-
Chainsaw Tools: A toolbelt with a 2-pound hammer, tree wedges, and a scrench are the basics.
-
Safety Gear: Chaps, gloves, and a helmet with both hearing and eye protection.
-
Handsaw: A great addition for hinge cutting projects when attention to detail is a priority.
-
Habitat Hook: Another great tool to help aid in the fall direction after you hinge cut trees.
-
Plant Identification: Whether it be a tree identification book or an app on your phone, it is important to have a basic understanding of what types of trees you have on your property.
Forest Stand Improvement Tips and Tricks
Entire articles can be written on different topics under the umbrella of forest stand improvement so I will keep it simple and cover just a couple of tips for your first project.
Making a priority list of what areas of your property could benefit the most from forest stand improvement projects can help provide you with a starting point. For example, creating bedding areas adjacent to a primary food source will attract doe groups. Thus creating a hotspot for increased buck activity during the rut on the downwind side of the bedding area.
Arguably the most important consideration is to consult with a professional when necessary. The larger a forest stand improvement project is the more technical and dangerous it can become. There are many valuable resources available including the local extension from your state forester.
Travel Corridors
Travel corridors connect the different habitat improvements throughout your property and create a flow to influence how and why the deer travel across the landscape. There are numerous methods for developing corridors based on habitat with the common goal being to provide the deer with the easiest path of travel to a desired destination.
Travel Corridor Materials and Tools
-
Chainsaw: Keeping a lightweight chainsaw in your hand for these projects can help improve efficiency.
-
Chainsaw Tools: A toolbelt with the arsenal listed above can help you reach anything you need right away.
-
Safety Gear: Safety is always a priority regardless of the project.
Travel Corridor Tips and Tricks
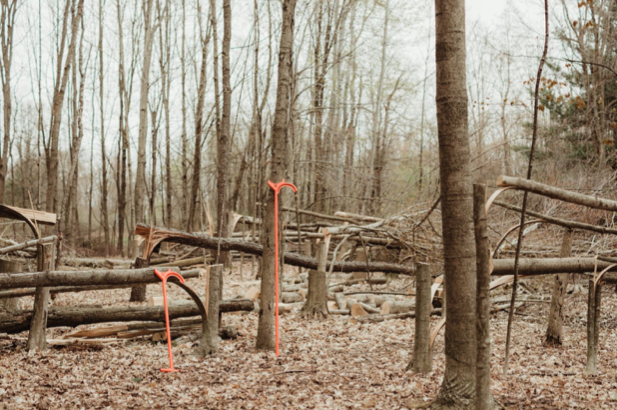
When you create a travel corridor in the timber your goal should be to create the easiest path of travel without making the deer feel like they are overexposed while traveling along it. Dropping trees perpendicular to the travel corridor is a great way to create an obvious route of least resistance.
Be sure to have intention with your destination. A well manicured trail leading to nowhere won't receive much activity. Some of my favorite travel corridors to install are designed with buck travel in mind and will run parallel on the anticipated downwind side of doe social areas such as a primary food source or bedding areas.
Waterhole
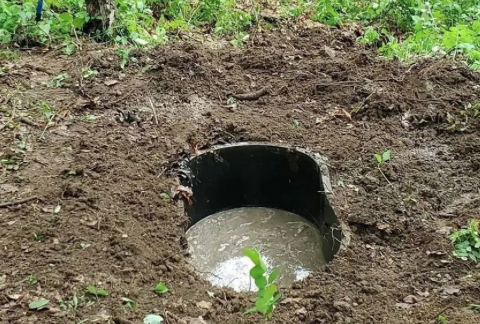
Waterholes are a great way to attract deer into a certain area. Proper waterhole installation includes burying the tub below the surface in a location where the immediate radius will drain towards the waterhole. Doing this will allow rainwater to drain into and fill up the waterhole.
Waterhole Materials and Tools
-
Water Tub: A hard plastic 110-gallon tub from Tractor Supply or your local farmer's co-op.
-
Excavation: Whether you are using a hand tool such as a shovel or larger equipment.
-
Rodent Stick: Very important! Always make sure to add this in so curious critters have a means to escape.
Waterhole Tips and Tricks
Waterholes can be great trail camera locations to gather inventory on your local deer herd during the dryer summer months. They can also make for great locations to hunt and catch bucks as they are cruising your property looking for does in late October through early November.
If you are in an area that receives limited rainfall, be sure to install your waterhole in a location where you can manage to fill it with water. An empty tub buried in the ground is no good if you are unable to add water to it.
Mock Scrapes
Mock scrapes are another great way to attract deer into a certain area. Natural scrapes are often communication hubs that deer will use to interact with one another. As you continue to improve habitat on your property you can influence movement in certain areas with mock scrapes.
Mock Scrape Materials and Tools
-
Grapevine: Using approximately 4-5 feet of a sub 1-inch diameter grapevine, line up the bottom of the vine at hip level.
-
Paracord: Tie the paracord to an overhanging branch or between two nearby trees while connecting the other end to the grapevine to provide a licking branch.
-
Hard Rake: A hard rake will make it easier to expose the soil when creating the scrape. My ideal mock scrape size is typically a 3-foot by 3-foot square.
Mock Scrape Tips and Tricks
Location trumps product every single time. There are countless licking branches and attractants available on the market to entice deer to visit your mock scrape location. I can say from experience that where you put your mock scrape means far more than the product that you use.
Installing your mock scrape on a flat surface will increase the likelihood that deer will interact with them. Very rarely if ever will you see a natural scrape on uneven ground and I always do my best to try and imitate the real thing.
Combining Habitat Improvements to Stack Your Odds for Hunting Season
While any of these projects would help you improve your odds this fall, finding a way to have them work in sync can present even more opportunities throughout your property.
When designing a whitetail property a top goal is influencing a mature buck to spend more time on their feet during daylight hours. When you pair projects together, you are giving mature bucks multiple reasons to spend more daylight hours within your property.
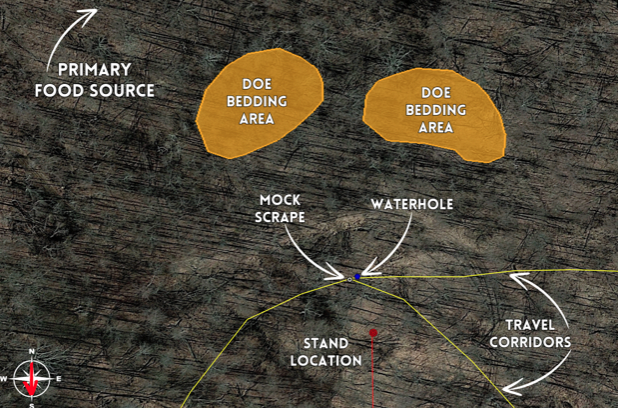
Here is a snapshot of a design example showing how the four projects I talked about above can work together to stack your odds and present you with more opportunities to punch your tag:
-
The first element to point out is the doe bedding area, a forest stand improvement project completed during the springtime. Doe groups will typically seek the first available cover near a destination food source. By opening up the canopy, creating horizontal cover through hinge cuts, and implementing multiple entry/exit routes this should become a doe hangout before long.
-
Next up we have the travel corridor. Not all travel corridors are the same as some are designed with the intent of giving does an easy path of travel to/from bedding. The travel corridor you see here is designed to influence buck travel through a specific area. With the doe bedding area just to the north, we can anticipate bucks to use this travel corridor during any north wind to scent check the doe groups.
-
Now let’s bring it all together with the mock scrape and waterhole. This combo is a great way to improve the effectiveness of your travel corridor and stack your odds. On a north wind, there are now three different reasons for a buck to use this corridor whether he wants to scent check does, freshen up a scrape, grab a drink, or a combination of the three.